All things Pumpkin!
Being that its fall I wanted to kick off my recipes with one of my favorite fall staples… pumpkin. Over the last few years I’ve been trying to cut out canned goods. Most cans have a lining that has BPA in it contaminating the food inside. BPA free cans do exist but the goods are pricey and the cans still have chemicals in them. Canned pumpkin seemed like something I could easily figure out how make on my own and it was! So to start here is how to roast a pumpkin.
Roasting a Pumpkin
Ingredients/tools:
1 small pumpkin pie pumpkin
Aluminum foil
Medium size cookie sheet
Directions:
- Preheat your oven to 400 degrees.
- Remove the stem from the pumpkin using a butter knife
- Slice the pumpkin in half & remove the seeds. (I like to save the seeds for roasting)
- Line a cookie sheet with aluminum foil. (You can skip this step but I found the clean up was a breeze with the foil)
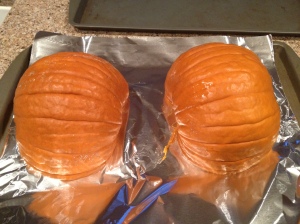
- Place each half of the pumpkin cut side down on the foil and bake for an hour or until tender.
- Let cool then scoop out the filling, discarding the skins.
- You can mash up your filling or if you want a smoother texture use a food processor/blender to puree it.
- I make large quantities at a time and then package them in 15 oz sizes to freeze. Then when I want to make a pumpkin recipe I already have it on hand and measured out to the equivalent of 1 can.
Need some ideas on how to use your new pumpkin puree? Try a pumpkin smoothie or pumpkin bread!


